 Help Center
Banners in Inline Manual help you deliver targeted messages, announcements, and guidance to users in a seamless way. They can be positioned at the top or bottom of a page, embedded directly into the UI, or displayed as an overlay. This guide will walk you through the steps to create and customize a Banner in the Inline Manual Builder.
Accessing the Banner Feature
To create a Banner, follow these steps:
Open the Inline Manual Builder extension.
Navigate to the Site where you want to create the Banner.
Click Create and select Banner.
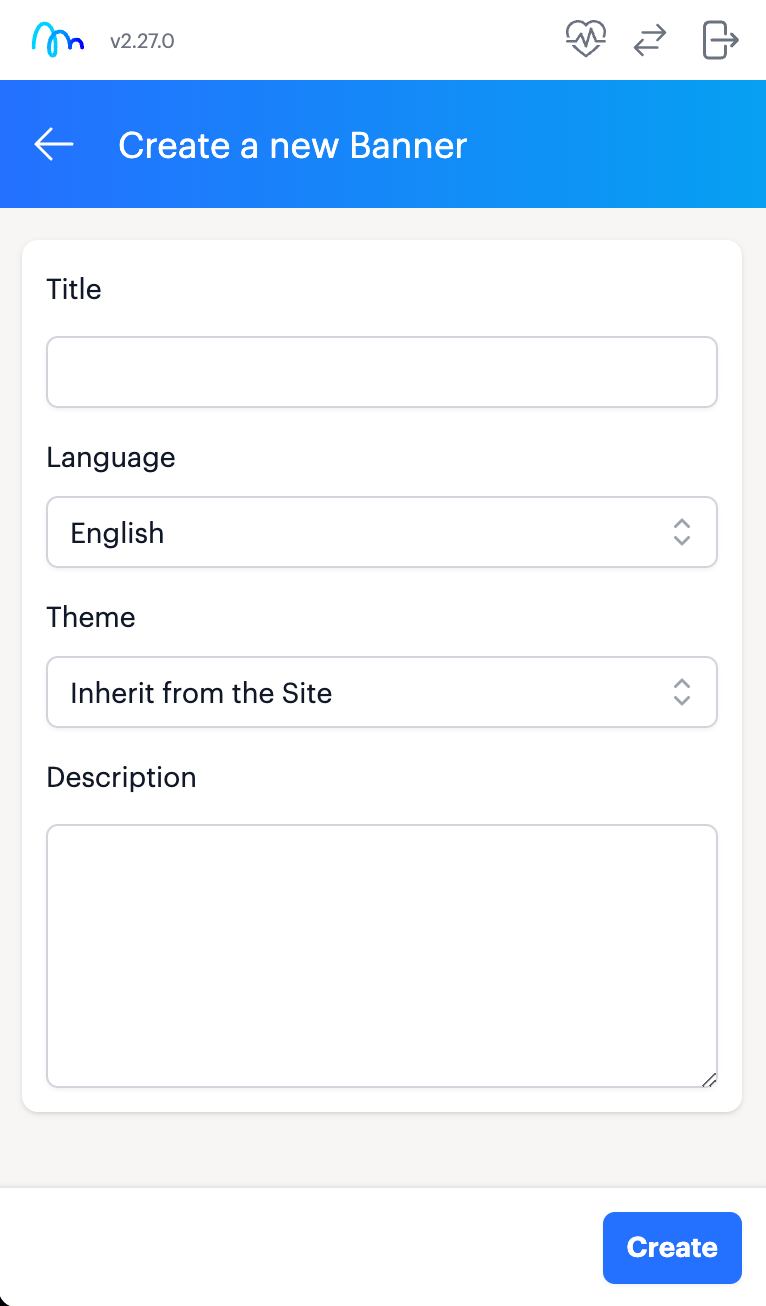
A new screen will appear where you can enter:
Title and Description (to identify your Banner internally)
Language (for multilingual support)
Theme (to set the visual style)
Click Next to proceed to the Banner configuration screen.
Configuring Your Banner
On the configuration screen, you will find different sections to customize your Banner:
A. Content Settings
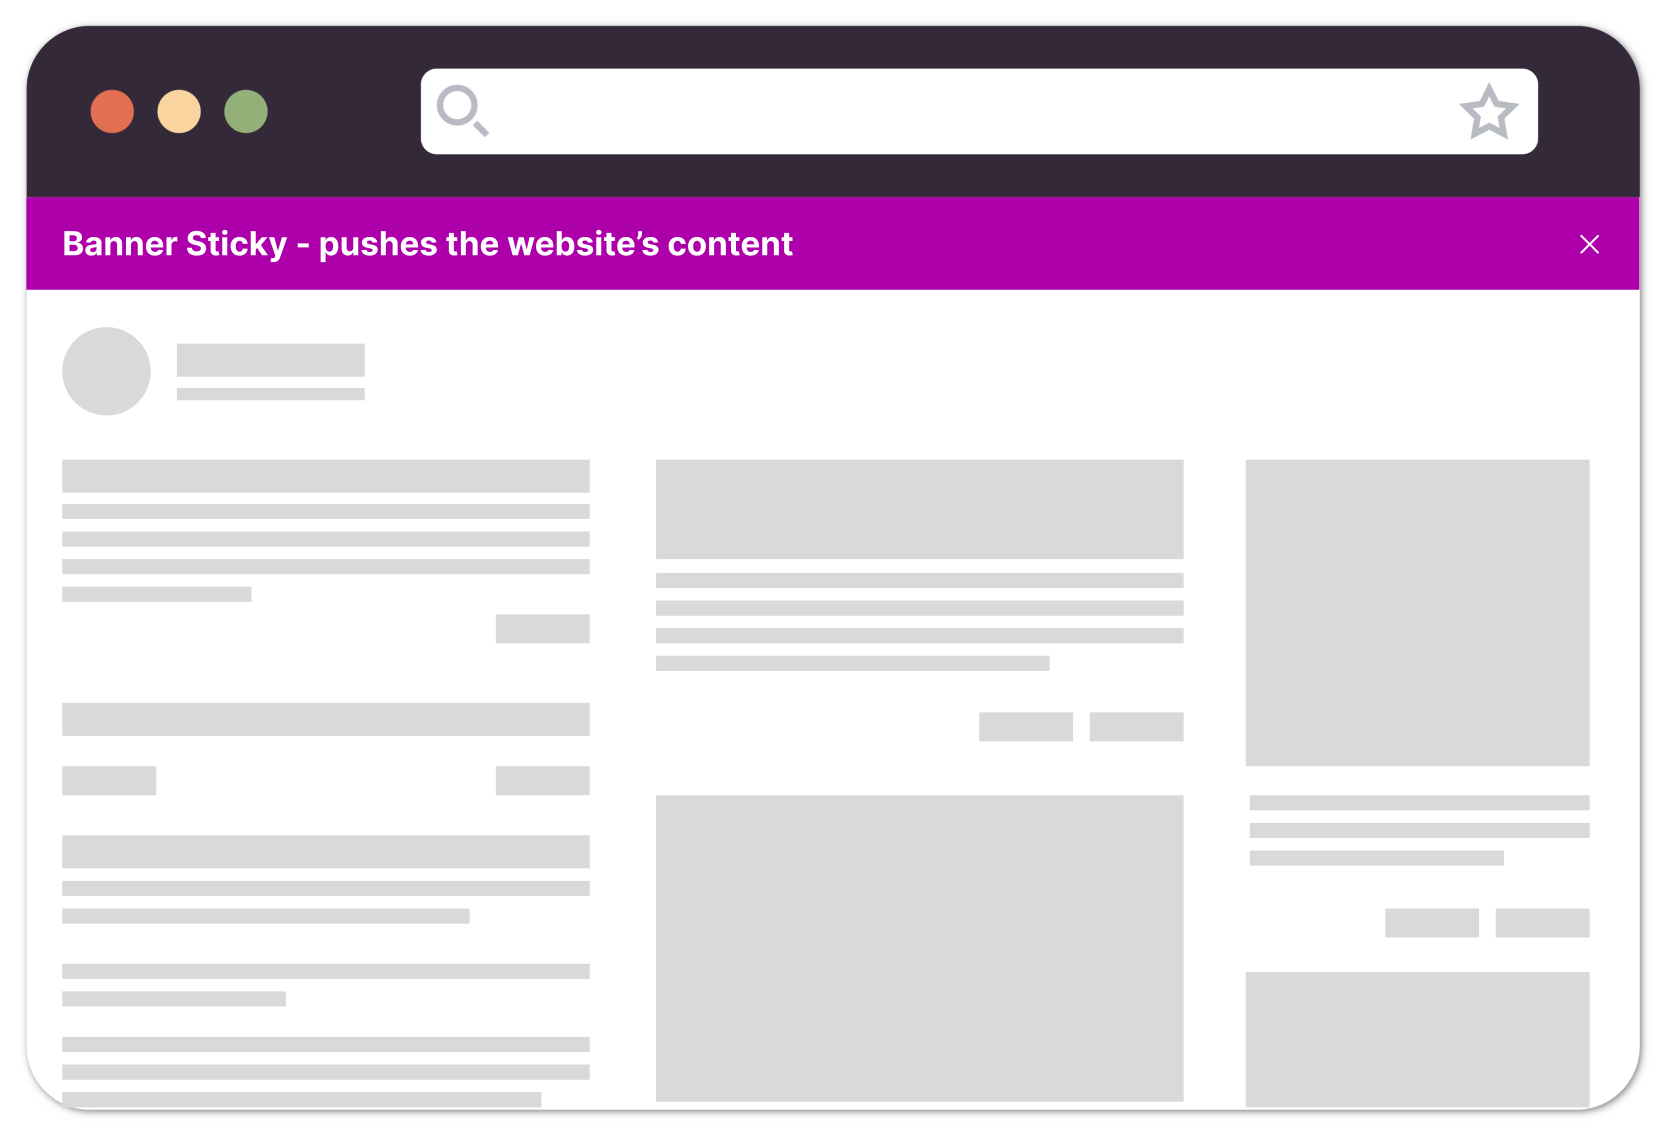
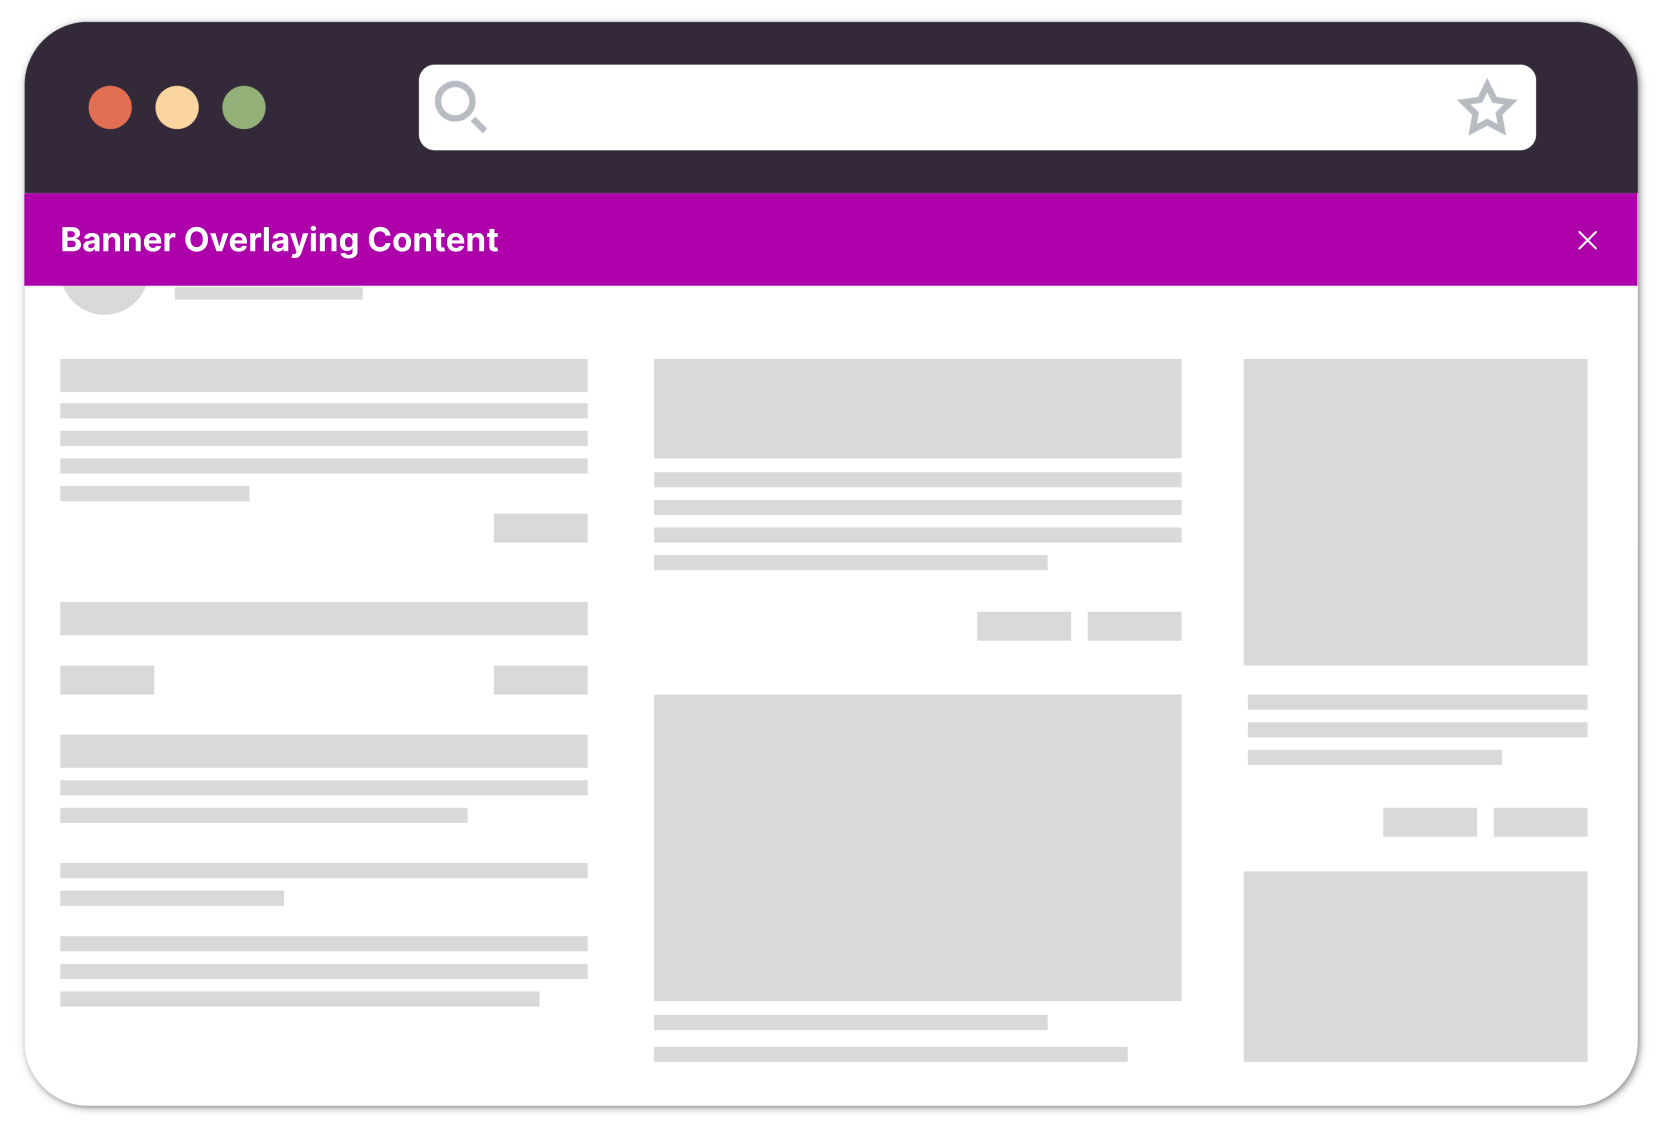
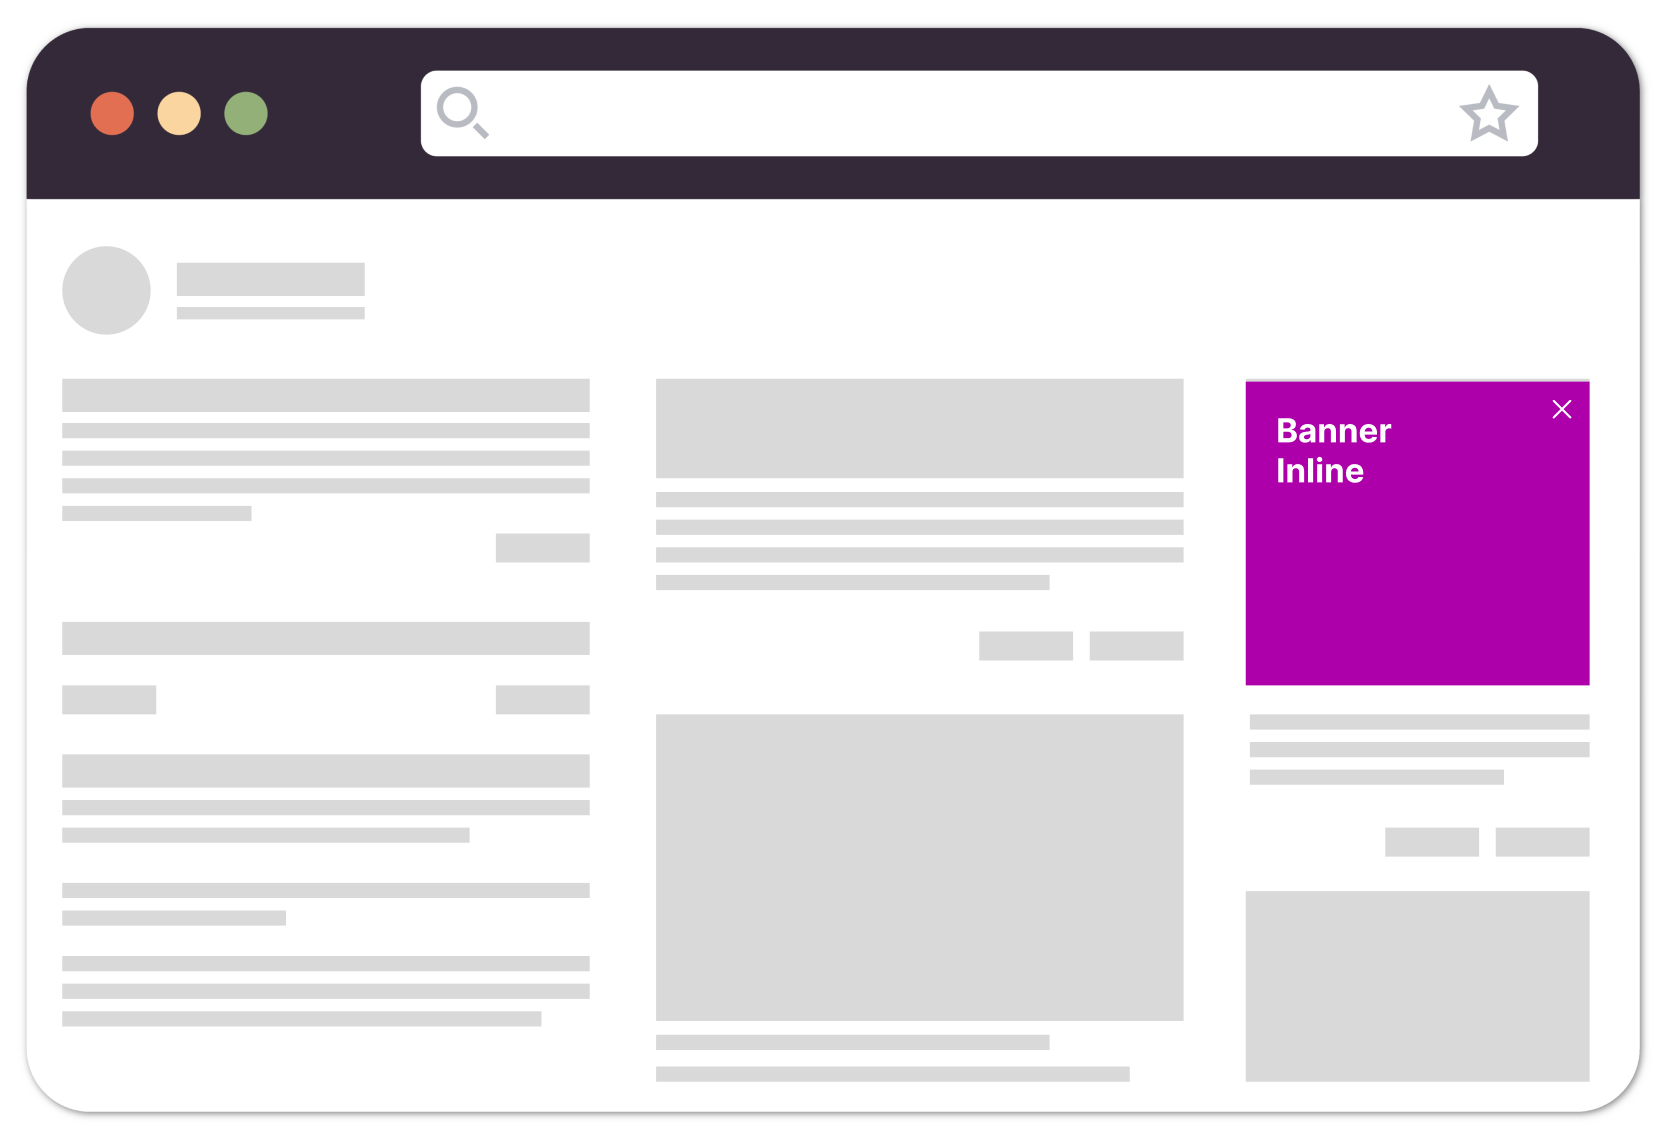
Embed: Choose how the Banner appears:
Sticky – Remains visible while the user scrolls.
Overlay – Displays over the content.
Inline – Blends naturally into the page layout.
Position:
Top – Appears at the top of the page.
Bottom – Appears at the bottom of the page.
Theme: Select a pre-defined theme or inherit from the topic.
Margin: Adjust spacing (Top, Left, Bottom, Right) to fine-tune placement.
B. Targeting Rules
Define where and to whom the Banner should be shown:
Page Targeting:
Select "Match any filter (OR)" to define page rules.
Click Add Current URL Rule to apply the Banner to the current page.
Audience Targeting:
Click Update the segments in the Site > Topics to refine user targeting.
C. Miscellaneous Settings
Z-index: Adjust the stacking order of the Banner to prevent it from being hidden by other UI elements.
D. Advanced Settings
Custom Class: Apply additional CSS styles for more advanced customization.